Servicing Kirby slide assembly
Last Updated: 05/18/2010
|
Problem:
When the drive is engaged, it occasionally sticks. That is, it doesn't seem to always want to engage the drive. If the vacuum is rolled back and forth a couple of times, it will engage. |
Possible Causes:
If you remove upright handle and try to move Handle "Pivot Spring assembly" (the piece where you insert the handle) is is supposed to slide back and forth a little bit under 1/4 on an inch (4 mm or so) each direction. If it sticks, feels like something is grinding does not move smoothly or does not move at all - most likely your Kirby vacuum bearing/slide assembly is dirty, worn or corroded or any combination of the above. |
Suggested Solutions :
Clean or replace Kirby bearing slide parts - see instructions below: |
Disclaimer:
Goodvac.com is not affiliated with The Kirby Company and/or The Scott Fetzer Company. All manuals and maintenance tips for Kirby vacuum cleaners and repair manuals for Kirby model vacuums are authored by GoodVac.com and are not endorsed or approved by the Kirby vacuum manufacturer - Kirby Company and/or The Scott Fetzer Company. These materials should be only used at your own discretion and risk. .
Read our "Terms of Use". |
Kirby bearing slide service/replacement
|
Just to make sure that we use same vocabulary:
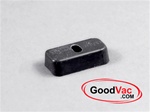
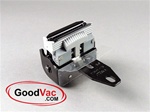
This is "Guide Block" (Kirby parts #178797s)
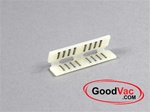
This is "Bearing Assembly" (Kirby parts # 178989s)
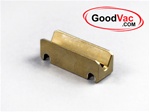
This is "Slide" (Kirby parts # 676595s)
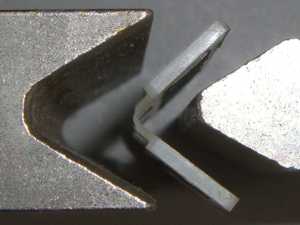
This is "Wedge" (Kirby parts # 179489s)
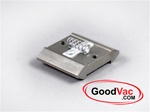
This is "Slide Bracket Casing" (Kirby parts # 849003s )
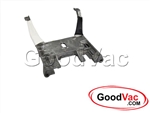
This is "Pivot Spring Assembly" (Kirby parts # 671901g )
FIRST unplug the Kirby from electric outlet!
|
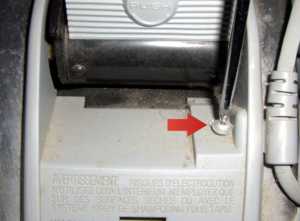 |
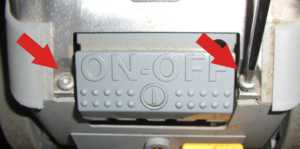
1.
Remove scuff plate screw (Kirby parts number 233506S) holding the cord clip (T15 torx screwdriver or Phillips screwdriver on older models) |
 |
2.
Remove scuff plate bottom screw (Kirby parts # 233405S) (T20 torx screwdriver or Phillips screwdriver on older models) |
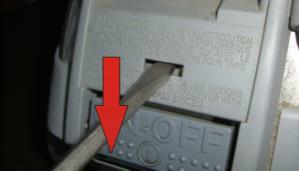 |
3.
Put the flat screwdriver through the opening in the scuff plate and push it down thus releasing a latch inside so you can take the scuff plate off. |
 |
4.
Remove 2 rear cover shell screws (Kirby part # 232495S ) (T20 torx screwdriver or Phillips screwdriver on older models) |
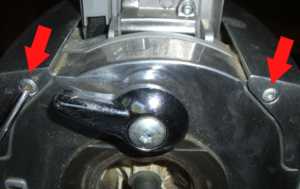 |
5.
Remove 2 front cover shell screws (Kirby part # 232395S ) (T20 torx screwdriver or Phillips screwdriver on older models) |
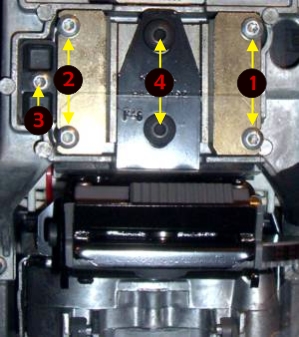 |
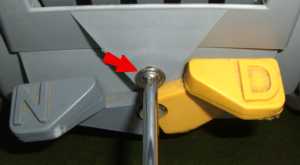
6.
Now you have access to the Kirby slide assembly.
To remove it - remove 5 screws (Kirby part # 434397s) marked #1; #2 and #3.
Clean the parts. Use some alcohol to dissolve the old grease and dirt. Now carefully inspect surfaces for wear. If slide and/or guide blocks are worn - replace worn parts. If parts are not worn but just very dirty or corroded you can use a fine sanding paper. I would say sanding paper #800 is perfect. Would not recommend using sandpaper with number less than #600.
If parts are worn but you have a few sheets of fine sandpaper and hours of free time - you can try sanding the surfaces till they are smooth again (sandpaper has to rest on a smooth hard surface). If replacing guide or slide - we would recommend replacing bearing strips as well as most likely they are worn too it is just not that easy to see the wear on tiny bearing rollers.
Clean the parts again make sure they are completely dry and and lubricate before assembly. Guide blocks are identical so it does not mater what side is facing up or which one is on the left or on the right.
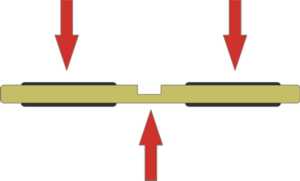
Put in screws #1 and #2 but do not tighten yet. Put the wedge in (tapered side to the taper on the slide bracket casing) and tighten screw #3 just enough to get the slide to your right flush with slide bracket casting. Now tighten screws #1.
Loosen the screw #3 and start tightening it again but this time no more than 1/4 or the turn and keep checking how slide is moving. It has to be tight enough to not have any slack to any other direction other than to the front and to the back. It has to move very easily and smoothly. Now tighten screws #2
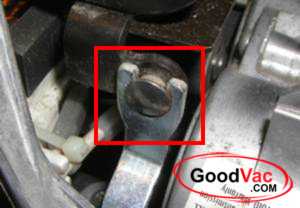
IF YOU HAD TO REMOVE "Pivot Spring Assembly"
You have to install it when slide bracket casting is installed on the Kirby vacuum.
Make sure that slide does not reach slide bracket casting when moving pivot spring assembly.
When released it has to come back to the position where Kirby comes to rest even when transmission is set on "D". |
| |
Few things to pay attention to: |
|
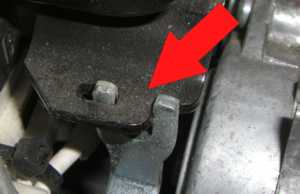
When installing pivot spring assembly make sure it is properly engaged with Kirby power drive |
 |
This is for Kirby vacuum models G3, G4 and G5. |
 |
This is for Kirby vacuum models Gsix, Ultimate G, Ultimate G Diamond Edition and Sentria. |
|
|
| |
Now just assemble the shell back onto the unit. |
|