|
|
|
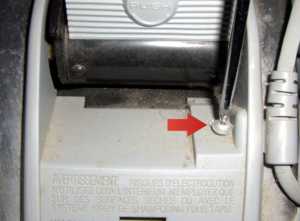
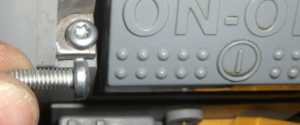
1.
Remove scuff plate screw (Kirby parts number 233506S) holding the cord clip (T15 torx screwdriver or Phillips screwdriver on older models)
|
|
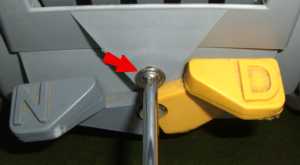
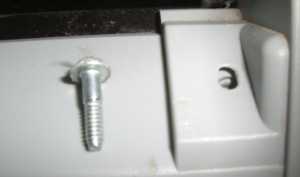
2.
Remove scuff plate bottom screw (Kirby parts # 233405S) (T20 torx screwdriver or Phillips screwdriver on older models)
|
|
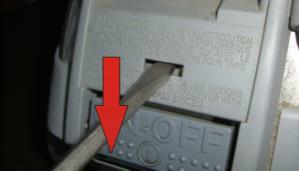
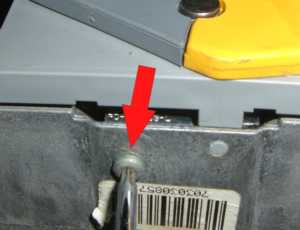
3.
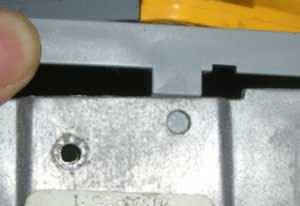
Put the flat screwdriver through the opening in the scuff plate and push it down thus releasing a latch inside so you can take the scuff plate off.
|
|
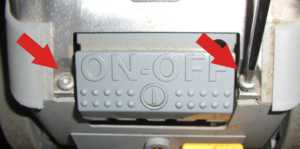
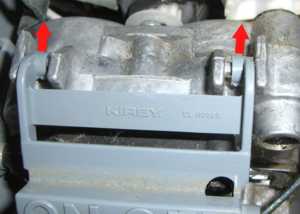
4.
Remove 2 rear cover shell screws (Kirby part # 232495S ) (T20 torx screwdriver or Phillips screwdriver on older models)
|
|
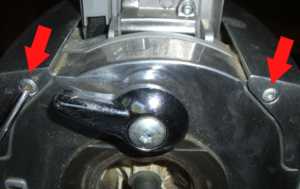
5.
Remove 2 front cover shell screws (Kirby part # 232395S ) (T20 torx screwdriver or Phillips screwdriver on older models)
|
|
6.
Pull the Kirby plastic ON/OFF pedal of the transmission. It comes off VERY EASY
|

|
7.
Disconnect pedal from actuator rod. (Kirby parts number 612400S )
|
|
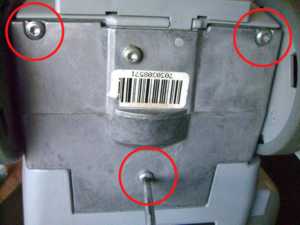
8.
Remove 3 screws on the bottom of the kirby holding the tech drive onto the unit (Kirby parts number 230693A)
(T20 torx screwdriver or Phillips screwdriver on older models)
|
|
9.
As transmission gets a bit loose you can get gears closer to each other so now you will be able to remove the primary drive belt (You can buy it here) and that will release transmission completely
|
|
10.
Once transmission is off the unit you can remove screw (Kirby part 234097S) holding Kirby N/D pedal in place.
You van find pedals for you Kirby here:
For Kirby G4, G5 and G6 models only BLACK is available Kirby parts number 558499S
For Kirby G3, Ultimate G and UG Diamond edition - GRAY Kirby parts number 558401S
For Kirby Sentria - GRAY/ORANGE Kirby parts number 558406S
|
|
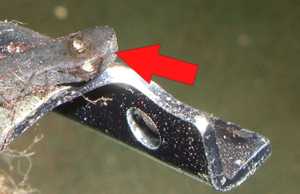
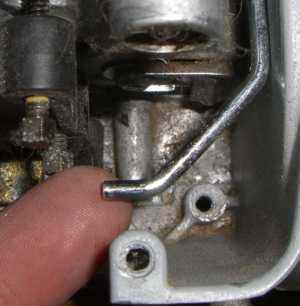
11.
After that you should be able to remove the pedal and Bracket-Cam assembly (Kirby part number 557689S). As you see there is a bit wear on the lever but usually this much wear will not cause any problems.
|
|
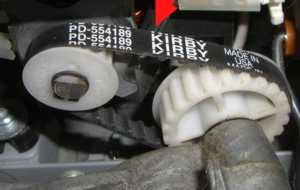
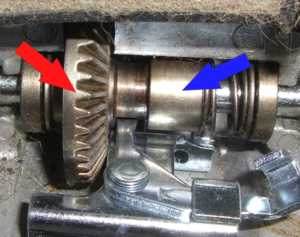
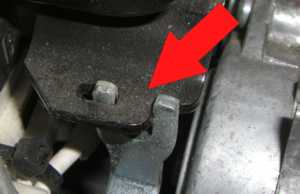
12.
Here what the Bracket cam (Kirby part number 557689S) is for and how it works:
Gear with BLUE arrow is attached to the wheel axle but can slide on it.
Gear with RED arrow is attached to Kirby transmission and spins clockwise or counterclockwise but is NOT attached to the wheel axle.
When you press the pedal to N (NEUTRAL) position the bracket-cam lever moves Gear with BLUE arrow to the right - away from the other gear thus disengages the axle and Kirby is in NEUTRAL. When you press D then the BLUE gear engages with the red again and momentum from transmission is passed to the axle.
If on NEUTRAL Kirby vacuum is making crackling noise it is usually because bracket cam lever is worn too much and does not completely disengage gears. Operating Kirby on neutral while it is making this unpleasant sound may eventually wear out the gears (Kirby part number 559892S).
|
|
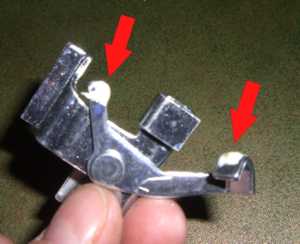
13.
Make sure you put some Lithium grease on the lever where it touches the gear and where pedal touches the lever on the other end. It will prolong the lifetime of this Kirby part.
|
|
14.
Assemble the Kirby bracket cam onto the pedal assembly. While "D" is pressed insert it so bracket-cam lever goes in between the gears.
|
|
15.
Insert plastic protrusion of the pedal into the opening on the transmission housing and allign the threaded hole of the bracket cam with screw hole. Put the screw holding the pedal and bracket back (Kirby part 234097S).
|
|
16.
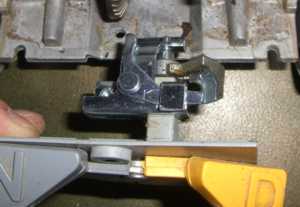
Insert the transmission back into Kirby, install the belt on the plastic gears before you attach the transmission to the Kirby main body with screws make sure that the transmission fork is engaged with the handle pivot assembly like this.
|
|
17.
Make sure that switch actuating rod is not caught in between transmission and housing
|
|
|
18.
Tighten all 3 screws on the bottom of the kirby holding the tech drive onto the unit (Kirby parts number 230693A)
(T20 torx screwdriver or Phillips screwdriver on older models)
|
|
|
19.
Just like you removed the pedal - slide it back onto the rod (JUST OPPOSITE TO THE AROW)
|
|
|
20.
And attach the ON/FF pedal to the transmission (JUST OPPOSITE TO THE AROWS)
|
|
|
21.
Put in back 2 front cover shell screws (Kirby part # 232395S ) (they have pointy end and are cone shaped at the bottom)
(T20 torx screwdriver or Phillips screwdriver on older models)
|
|
22.
Install 2 rear cover shell screws (Kirby part # 232495S ) (T20 torx screwdriver or Phillips screwdriver on older models)
|
|
23.
Scuff plate / Cord clip screw (Kirby parts number 233506S) holding the cord clip (T15 torx screwdriver or Phillips screwdriver on older models)
(do not forget to put cord clip under the scuff plate)
|
|
|
24.
Scuff plate bottom screw (Kirby parts # 233405S) (T20 torx screwdriver or Phillips screwdriver on older models)
|
|
NOW YOU ARE READY TO USE YOUR KIRBY VACUUM
|